
.jpg?width=1029&height=514&name=Featured%20image_%201100x550px%20(76).jpg)
Google Analytics 4 (GA4) is the latest version of Google's analytics platform. In this article, we show you how to set up a basic GA4 in just 4 minutes, using Google Tag Manager.
Before you begin, please note that these instructions assume that you already have Google Tag Manager and Google Analytics 3 (Universal Analytics) installed on your website.
Minute 1: Configure property and data flow
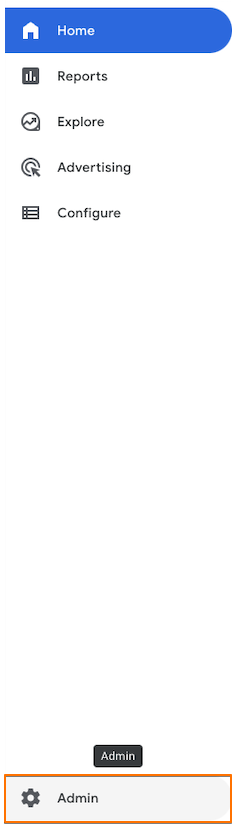
In the first minute, you will create a new area in your Google Analytics account. To do this, log into your account and click the "Admin" button in the bottom left corner.
Then click the "Create property" button in the middle of the screen. Select "Web" or "App" depending on the type of data to collect.

On the next screen, you will be asked to enable “Enhanced Measurement”. Enabling enhanced measurement will automatically track certain events, such as scrolling, outbound clicks and website searches. By default, some events are on, so you can enable or disable the ones you want to measure or not measure by clicking the gear icon in the bottom right.

Name the data stream, and insert the URL of your page.
Now you have to create the data stream by clicking the button. A data stream is a collection of data sent to GA4 from a specific source, such as a website or mobile app. You can send multiple data streams to the same area if you want.
Now we are in the right window, but for the sake of clarity we will take it from the top. To create a data stream:
- Click on the “Admin” button
- Select the correct area
- Click the "Data Streams" tab and then click the "Create Stream" button (you can do that now).
- You will now have the option to either set up the stream via, for example, Drupal or a couple of WordPress plugins, or by pasting the Google tag into the source code manually. We use Google Tag Manager instead, which is the best way anyway. Click away from that window.
Note the Measurement ID that has been generated.

If you wonder where to find this later, it is in the settings for data streams, under "Data stream details". It will be used in the following minute, when we will configure the Tag Manager. Tick Tock!
Minute 2: Configure GA4 tracking in Tag Manager
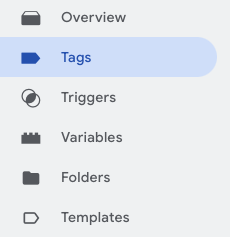
Now that you've created your site and data stream, you can set up GA4 tracking in Google Tag Manager. To do this, log into your Tag Manager account and navigate to the "Tags" tab. Then click the "New" button to create a new tag.
In the tag configuration, select "Google Analytics: GA4 Configuration" as the tag type. Next, type or paste your GA4 property ID, which you found in the previous minute.
Once you've created your GA4 tag, it's important to test it before publishing it to your website. You can do this by clicking the "Preview" button at the top right of the Tag Manager interface.

This will open a new tab and take you to a preview mode for your website. You can then click around your site and see if the GA4 tag is triggering correctly by checking it in the "Tags" section on the right side of the screen.
After you've verified that the GA4 tag is triggering correctly, you can publish the container and start tracking your data in GA4.
Minute 3: Track all events from Tag Manager to GA4
Now you can start tracking events from your website to GA4. To do this, you need to create new tags for each event you want to track.
To create a new tag:
- Click on the "Tags" tab in Google Tag Manager
- Click the "New" button to create a new tag
- Select "Google Analytics: GA4 Event" as the tag type

- In the "Event Name" field, enter the name of the event you want to track, or select from a list using the “+” sign.
- In the "Event Parameters" section, you can add additional information such as category, label and value for the event. We are not going through these right now, but you can read here to see what these do. We're running out of time!
- In the "Triggering" section, select the trigger for this event by selecting one of the triggers you configured when you set up the data stream. For example, if you want to track button clicks, select the "Click" trigger and then configure it to to be triggered when a button is clicked. You can do this by selecting "All items" as the trigger filter.

It is important to note that you must repeat these steps for each event you want to track. Once you've created all your tags, you can test them in Preview mode to make sure they work as they should before you publish them to your site.
Minute 4: define goals in GA4
Now that you're tracking all events from your website to GA4, you can mark them as goals in GA4. Goals allow you to measure and track specific actions on your website, such as button clicks or form submissions.
To mark an event as a goal, log into your GA4 account and navigate to the "Admin" tab. Then click on the "Events" button and select "Create Event".


In the goal configuration, select "Custom" as the goal type and set up your goals. Since we only have a few seconds left we let others explain the details of goal setting, but typical goals to set up can be:
- Contact Form Submissions: This metric will track the number of times someone fills out and submits a contact form on your website.
- Phone Conversions: This measure will track the number of phone calls to your business as a result of a click to call button on your website.
- PDF Downloads: This measure will track the number of times someone downloads a PDF document from your website.
- Purchases: This measure will track the number of completed purchases on your eCommerce website.
- Newsletter Signups: This measure will track the number of times someone signs up for your newsletter using a signup form on your website.
By setting goals, you can see how well your site is performing, which pages are most popular, and which actions are most valuable to your business. By setting goals, you can also track your progress over time and make data-driven decisions to improve your site's performance.
Tracking technically correct is something most people with a bit of Google skills can do. But tracking the things that are right to manage your specific business is something else entirely. If you need help figuring out what your company should track, contact us via our form and we will respond quickly.
Happy tracking!
